

previous step | next step
Step 3 create items for our new thing
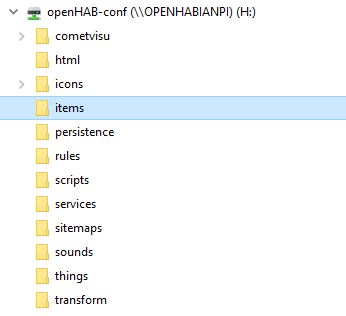
we do this in /etc/openhab2/items by adding the new items to a file with the extention *.itmes. In my case I add all items to the file Wohnung.items. How you handle this is your decision. I recommend to mount the /etc/openhab2 folder to your windows / mac PC that you can easily work on the openHAB configuration with an editor or the Eclipse Smart Home Designer.
Open your *.items file in the editor of your choice and add am item for the door/window contact state. This item shall be of type Contact.
In my case I add two lines for two new contacts. Door left and right in my dining room (Sorry for the german names…)
Contact cEsszimmerTuerRechts "Esszimmer Tür rechts [%s]" {channel="homematic:HG-HM-Sec-SCo:xxxxxxx:OEQxxxxxxx:1#STATE"}
Contact cEsszimmerTuerLinks "Esszimmer Tür links [%s]" {channel="homematic:HG-HM-Sec-SCo:xxxxxxx:OEQxxxxxxx:1#STATE"}
For the battery status you need to add Switch items:
Switch B_Esszimmer_TuerRechts "Batterie Esszimmertürsensor rechts" {channel="homematic:HG-HM-Sec-SCo:xxxxxxxx:OEQxxxxxxx:0#LOWBAT"}
Switch B_Esszimmer_TuerLinks "Batterie Esszimmertürsensor links" {channel="homematic:HG-HM-Sec-SCo:xxxxxxxx:OEQxxxxxxx:0#LOWBAT"}
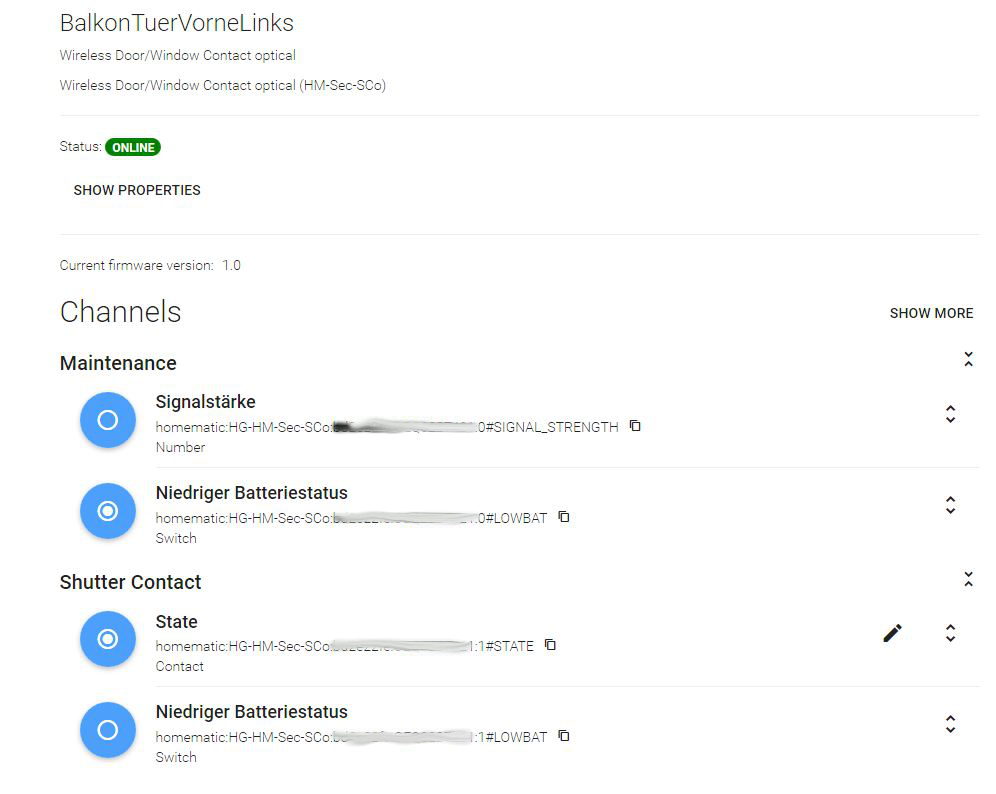
You can copy the channel reference from the paper ui page. Save the items file and wait a few second. Reload the paper ui page with your thing and you will see that the circles of the state channel are connected now.
You successfully created an item and you are ready now to write your first rules.