I started to play arround with the OBI Wifi switches (OBI Wifi Stecker Schuko). Its possible to flash them with new Arduino firmware (Tasmota), and integrate them with MQTT in my OpenHAB2 server.
Here a short summary how to install the MQTT broker Mosquitto in your Openhabianpi Server an a RaspberryPi.
The newest Openhabianpi is a Debian Strech Linux. So first we need to get the right repo from Mosquitto.org as root:
sudo wget http://repo.mosquitto.org/debian/mosquitto-repo.gpg.key
sudo apt-key add mosquitto-repo.gpg.key
Now we get the installation files a install them on the system:
cd /etc/apt/sources.list.d/
sudo wget http://repo.mosquitto.org/debian/mosquitto-stretch.list
sudo apt-get install mosquitto
Finally we enable the MQTT server, start it and finally check the status of the server:
sudo systemctl enable mosquitto
sudo systemctl start mosquitto
sudo systemctl status mosquitto
The status shall show something like this:

Done! Finally we can check if the MQTT server is listening on port 1883 for MQTT clients to register:
netstat -a
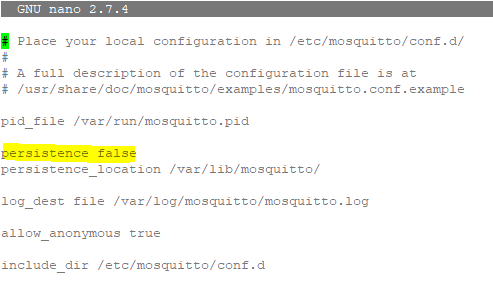
Additionally I recommend to disable the persistence in the mosquitto configuration. In my case it was by default switched on. This caused trouble with my devices. Because if they lost shortly connection and reconnect they always god the wrong state set from mosquitto and switched on and off suddenly.
So edit mosquitto.conf:
sudo nano /etc/mosquitto/mosquitto.conf

Now you are ready to connect your first MQTT broker with OpenHAB. For this we need to install the MQTT binding in Paper UI

You can continue now to configure everything with Paper UI (Since OpenHAB 2.4) But I recommend to do it with a things config file. For this create a mqtt.things file in the things folder of OpenHAB. Now you configure the bridge with the following definition:
Bridge mqtt:broker:mosquitto "Mosquitto" [ host="127.0.0.1", secure=false, clientID="openHAB2"]
{
......
}
Because openHAB is running on the same machine we can use simply 127.0.0.1 as host address. I use a unsecured connection because I use it only at home and not over the internet. „Mosquitto“ is a free name. Now you should see in Paper UI the following Bridge:

Now you can inside the brackets the devices (topics) which you have connected to Mosquitto as things. Here one example of a OBI wifi switch with tasmota firmware flashed:
Bridge mqtt:broker:mosquitto "Mosquitto" [ host="127.0.0.1", secure=false, clientID="openHAB2"]
{
  // My OBI switches with Tasmota
  Thing topic XXX "XXXWohnzimmer" @ "Wohnzimmer" {
   Channels:
     Type string : reachable "Reachable" [ stateTopic="Home/xxx/LivingRoom/tele/LWT" ]
     Type switch : power "Power" [ stateTopic="Home/xxx/LivingRoom/stat/POWER", commandTopic="Home/xxx/LivingRoom/cmnd/POWER" ]
     Type number : rssi "WiFi Signal Strength" [ stateTopic="Home/xxx/LivingRoom/tele/STATE", transformationPattern="JSONPATH:$.Wifi.RSSI"]
 }
}
This results in a new thing in your PaperUI with the name XXXWohnzimmer and 3 channels which you can connect now to items.
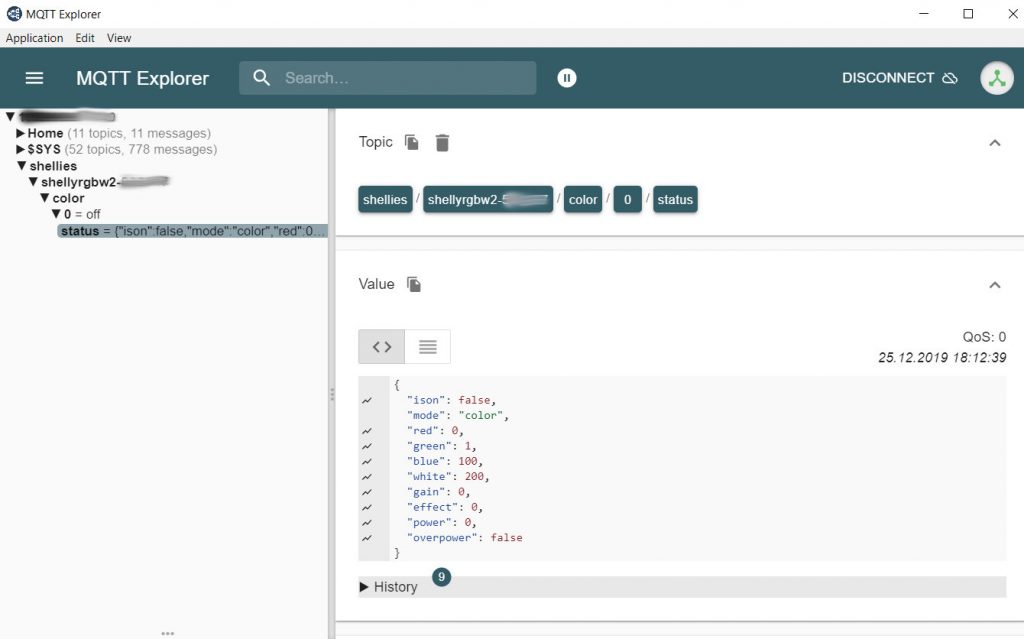
Note: To check from your PC the status of the MQTT broker and see which clients are registered, you can use MQTT Explorer. Very help full to see what topics your clients register at the broker:

