With this tutorial you get the following features realized:
- Boot up in kiosk mode showing the configured website full screen
- Touch control
- No disturbing mouse cursor
- Pi Leds switched off after boot
- Connection over wifi
- Customized splash screen logos
OpenHAB us used as example as a smart home control panel. Just replace teh URLs by your personal panel from OpenHAB or another smart home integration.
We use FullPageOS as basis. It si a GitHub project to show an web page in full screen directly after boot up
Hardware Setup
The Hardware setup ist simple. You need to connect the power connector cable and the display cable to the Raspberry Pi. It should look like this: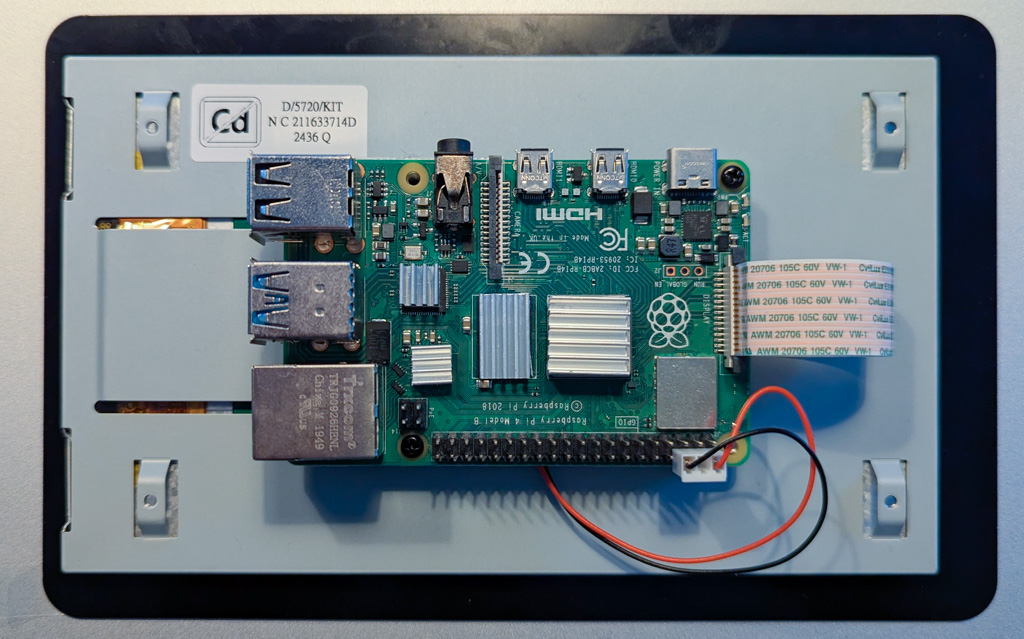
The setup is also decribed here
Installation
1.) Write image on an SD card
Download the lates nightly build from the FullPageOS GitHub project. This image is a modified Raspberry Pi 32Bit image. We use the original Raspberry Pi imager to write it to an SD card (minimum 8GB).
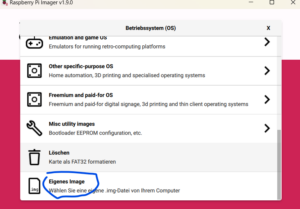
Choose your Raspberry PI model, the SD card and as OS go with „own image file“ as last option and select your downloaded FullPageOS image:
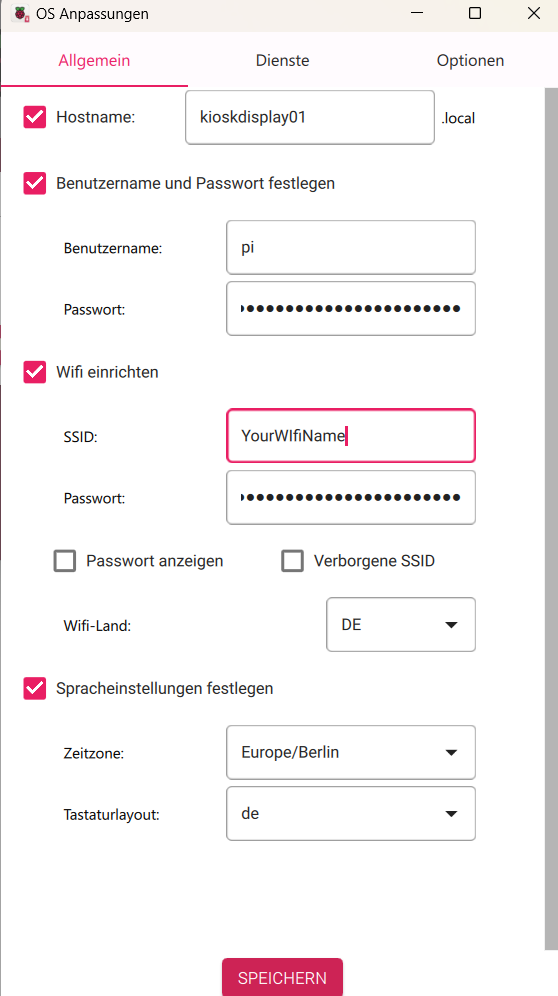
Press continue and change you settings for the image:
On first tab setup your Wifi name and password, your country, keyboad layout, your password for the user pi. Other user names as „p“i can make trouble later in the tutorial. So please keep the standard username „pi“.
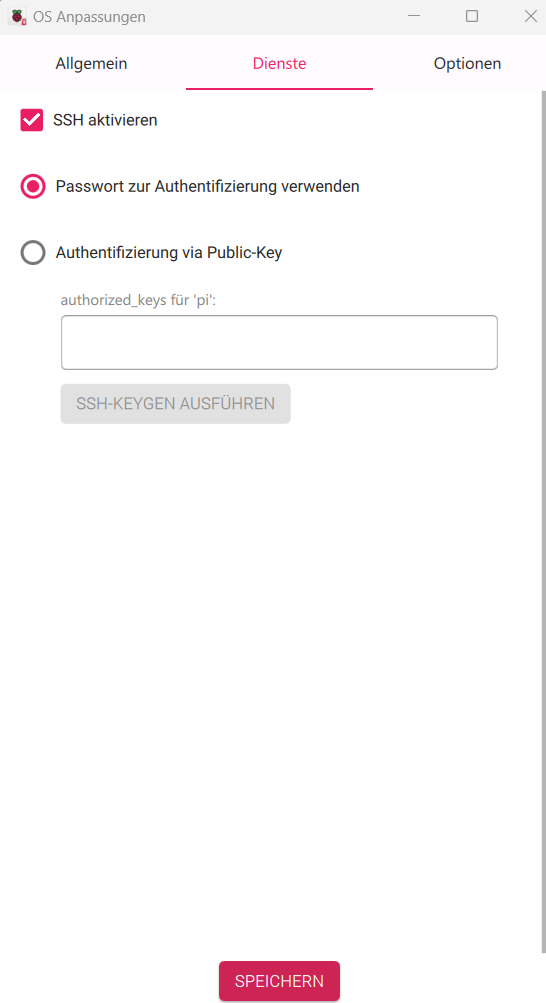
On the services tab activate SSH:
Save the configuration and write the image with this config. This will take a while.
After the the SD card is ready open it again on your PC. We need to set the initial web page in the FAT32 boot file system.
Open fullpageos.txt. This file contains the web site which is shown after startup. In our example we set it in the first step to our OpenHAB dash board. In my case this is:
http://192.168.178.100:8080/overview
Replace the IP address, with the IP address of your server and save the file, put it in the Raspberry PI and boot it up. First boot up will take a while but at the end you will see your configured website. Now you can connect a keyboard and log in in your server, if this is needed. In case of OpenHAB the login is stored and you don’t need to do it anmore on next boot up.
You can change your startup panel page to any other page in fullpageos.txt at any time you want.
2.) Enable touch for 7 inch Touch Display 2
After the first boot you see the web page but touch is not working. I fixed this by doing the folling change:
Connect via ssh to the booted Raspberry PI:ssh pi@kioskdisplay01
Open the config.txt file in a text editor.sudo nano /boot/firmware/config.txt
Search for the entry „start_x=1“ and disable it. This is needed to enable the touch functionality on the display. It should look like this:
[all]
# enable raspicam
#start_x=1
#gpu_mem=128
disable_splash=1
Reboot with:sudo reboot
3.) Disable mouse coursor
By default the mouse pointer is visibel in the screen. For a pure touch display this is normall not needed. To disable it we connect via ssh to the booted Raspberry PI like this:
ssh pi@kioskdisplay01
open the following file in an editior:
sudo nano /etc/lightdm/lightdm.conf
Change line:
#xserver-command=X
to:
xserver-command=X -nocursor
After reboot the mouse cursor is gone.
4.) Disable LEDs on Raspberry PI
As you may noticed, the red power LED is permanently on and also the green activity LEDs is flashing. If you don’t like this you can disable both LEDs in the config.txt file by adding the following lines at the end:
#switch off triggers for green LED:
dtparam=act_led_trigger=none
dtparam=act_led_activelow=off
#switch off red power LED:
dtparam=pwr_led_activelow=off
5.) Customize splash screens
By default FullPageOS is showing the FullPageOS logo while booting up you can change this any other png image file. You need to change the logo on two places.
First put the SD card in your PC and replace the file splash.png with your own logo. I used the official openhab logo:

For the second place boot the image again and connect with ssh and copy the same png file to /opt/custompios/background.png:
sudo cp /boot/firmware/splash.png /opt/custompios/background.png
and reboot.
